Getting started
Using the bindings from the Tulip GUI
Tulip Python bindings were primarily designed to add a scripting feature to the Tulip GUI (also known as the Tulip Perspective) and thus interactively manipulate the graphs loaded into it through lines of Python code. In that purpose, a Python IDE (Integrated Development Environment) window is available.
Tulip Python IDE
The Python IDE can be accessed through the Tulip GUI. Some GUI reorganisation
has been made in Tulip 5.0 and all Python development features are now centralized in a
separated window. It can be displayed by clicking on the  Python button located in the left side of the Tulip GUI.
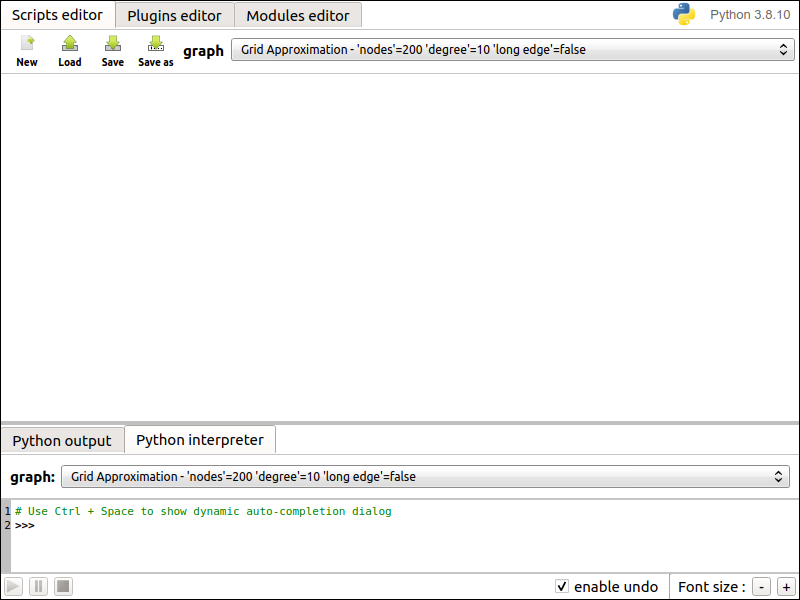
Figure 1: Screenshot of the Python IDE window displaying the Python interpreter.
The Python interpreter is the most basic way to dynamically interact with graph data. It enables to execute Python statements which are one after the other , read, evaluated then their result is printed. A combo box allows to select a graph from those already loaded in the Tulip GUI. The selected graph is then bound to a global Python variable named “graph”. Since Tulip 5.0, the undo feature on graph state is now handled in that component, meaning every graph modification performed by the executed Python statements can be reverted.
More sophisticated ways to write python code for graphs management purpose are proposed in the upper part of the Python IDE:
A Scripts editor (see Figure 2): it allows to write scripts that can be applied to the graphs currently loaded in Tulip. To do so, the “main(graph)” function has to be defined in the script code and is used as the script entry point. The graph currently selected through the combobox located in the upper part of the tab is wrapped as a
tlp.Graphobject and provided as parameter of the “main” function. The currently edited script can be launched ( button) through the control panel located in the lower part of the tab interface.
Once started, the script execution can be paused (
 button) or stopped (
 button); triggering the update of Tulip visualizations each time.
All modifications performed by a script on a graph can be cancelled/replayed through the Tulip undo/redo feature if the “enable undo” box is checked.
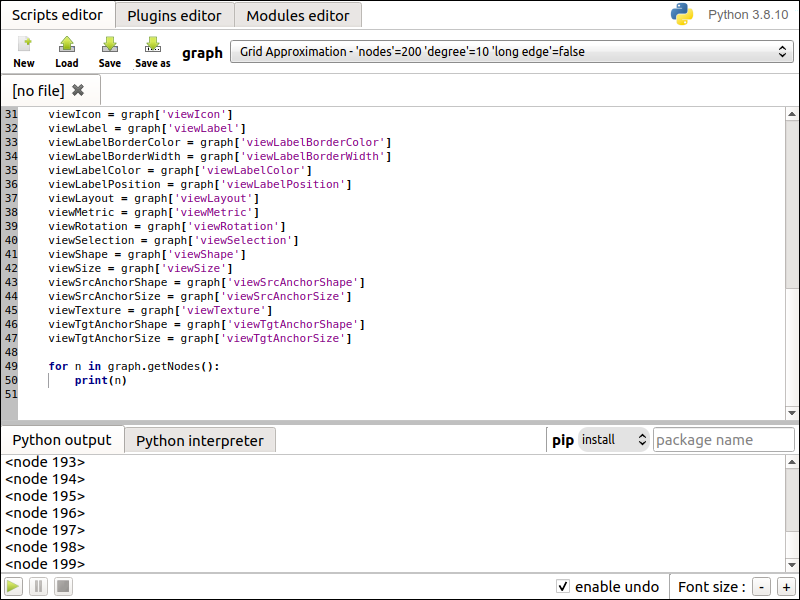
Figure 2: Screenshot of the Scripts editor tab in the Python IDE.
Pip tool graphic interface
As shown in the figure above, the Python IDE provides a graphic interface to interact with the pip tool of the Python environment used by Tulip. It allows to execute the following pip commands :
install (a package in the current user home directory),
list (packages installed in the current user home directory),
list all (installed packages),
show (package information),
uninstall (a package),
upgrade (a package).
After choosing the command, click in the package name input field, type the name, if needed, and hit the Enter key to execute it. The command ouput will then be displayed in the Python output tab.
A Plugins editor (see Figure 3): it enables to develop Tulip plugins in pure Python (see Writing Tulip plugins in Python). These plugins are then immediately integrated in the Tulip GUI when requesting their registration (if their source code is valid of course). Different kinds of plugins can be developed : General Algorithms, Property Algorithms, Import plugins and Export plugins. When executing these plugins, standard and error output will be displayed in the “Message Log” panel of the Tulip GUI.
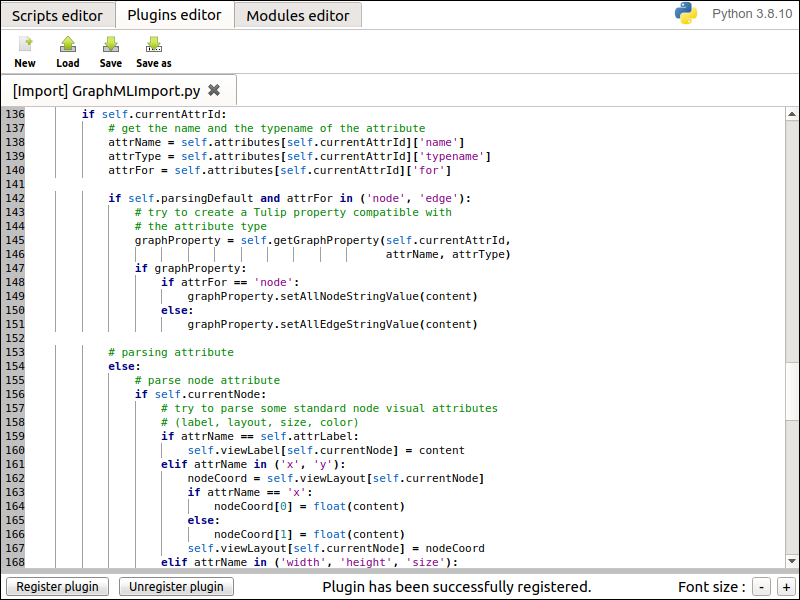
Figure 3: Screenshot of the Plugins editor tab in the Python IDE.
A Modules editor (see Figure 4): it enables to develop Python modules that can be immediately imported in the current Python session. The purpose is to have a library of utility Python modules that can be easily imported in the developed scripts and plugins.
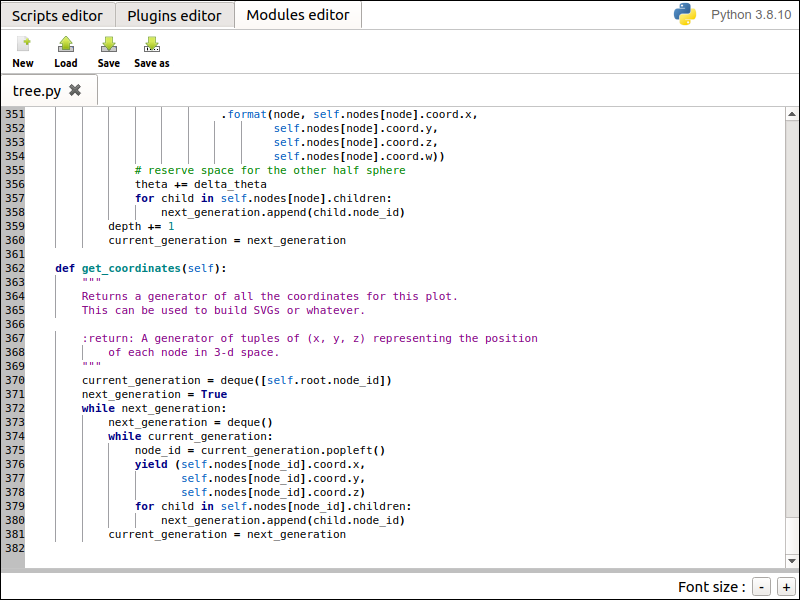
Figure 4: Screenshot of the Modules editor tab in the Python IDE.
Using the autocompletion to code faster
Each Python code editor widget provides an autocompletion feature in order to ease the development of scripts. To activate it, just hit Ctrl + Space and the autocompletion list will popup. Its contents will depend on the context before the current position of the text cursor.
Python objects autocompletion
The autocompletion list feature is really useful to get the contents of the dictionary
of Python objects. The list is filled by fetching the contents of a database according to the context.
That database contains the API of all standard Python modules but also the tulip ones.
That database is also updated dynamically by performing a static analysis on the source code (in particular,
that analysis tries to associate a typename to each variable in the source code).
The autocompletion will also popup immediately when hitting a dot character. If the variable before the dot
has an associated typename in the database, only the contents of its dictionary will be inserted in the list.
Figure 5 shows an
example of the contents of the autocompletion list when requesting it on the “graph” variable (of type tlp.Graph)
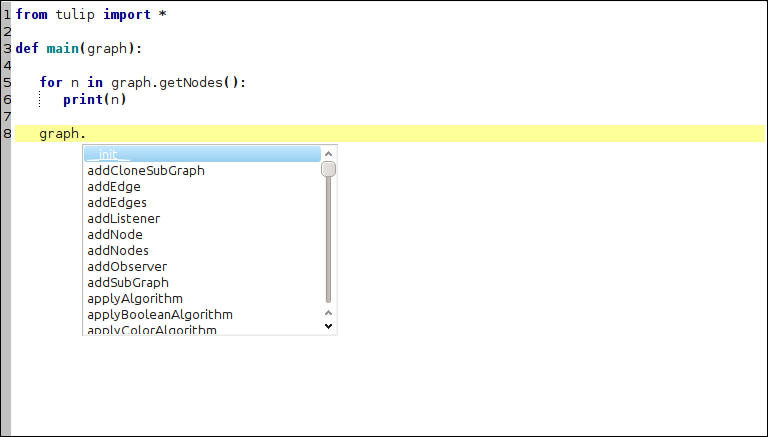
Figure 5: Using the autocompletion list to get the dictionary contents of a Python object.
Tulip specific autocompletion features
The autocompletion list facilitates the development of Tulip Python scripts especially with some specific features dedicated to the Tulip Python API:
Autocompletion for algorithms
Tulip is bundled with a lot of algorithms (plugins) that can be called through Python. To call an algorithm (plugin), one of the following method has to be used :
tlp.Graph.applyAlgorithm(),tlp.Graph.applyBooleanAlgorithm(),tlp.Graph.applyColorAlgorithm(),tlp.Graph.applyDoubleAlgorithm(),tlp.Graph.applyIntegerAlgorithm(),tlp.Graph.applyLayoutAlgorithm(),tlp.Graph.applySizeAlgorithm(),tlp.Graph.applyStringAlgorithm(),tlp.importGraph(),tlp.exportGraph(). The first parameter of those methods is a string containing the name of the algorithm (plugin) to call. When requesting the autocompletion list with the following context : graph.apply*Algorithm(, it will be filled with the names of the available algorithms (plugins). Figure 6 shows an example of the contents of the autocompletion list when requesting it with the following context : graph.applyLayoutAlgorithm(.
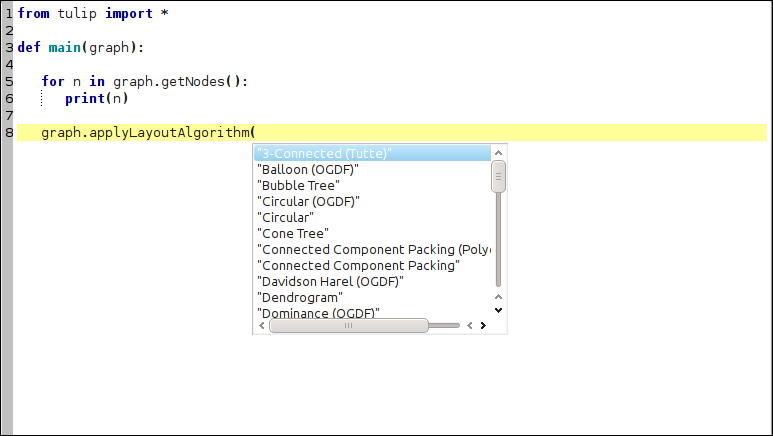
Figure 6: Using the autocompletion list to get the algorithm names.
Autocompletion for algorithm parameters
Parameters can be passed to Tulip algorithms through a dictionary. The parameters are identified by their names. The autocompletion list can be used to get the names of these parameters. Figure 7 shows an example of the autocompletion list contents when requesting the parameters of the layout algorithm : “FM^3 (OGDF)”.
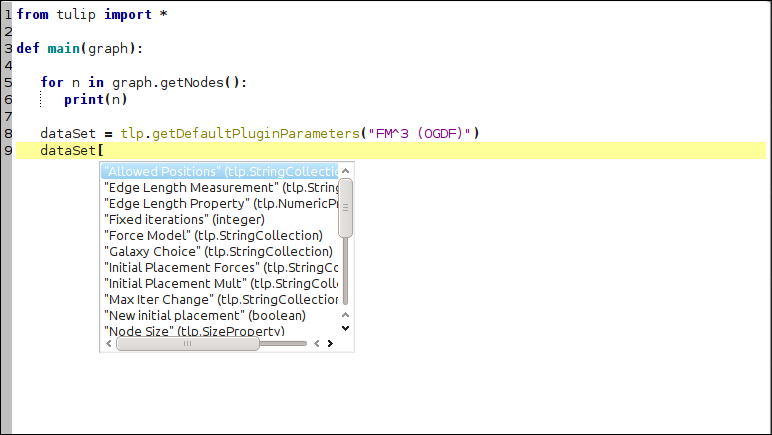
Figure 7: Using the autocompletion list to get the algorithm parameters names.
Autocompletion for string collection parameters
Some algorithms parameters are internally based on a
tlp.StringCollectioninstance. It allows to select a string from a defined set. The direct use of that class is now deprecated but the autocompletion list can be helpful to get the names of the available values that can be transmitted to the algorithm. Figure 8 shows an example of the autocompletion list contents when requesting the string collection values for the “Allowed Positions” parameter of the layout algorithm : “FM^3 (OGDF)”.
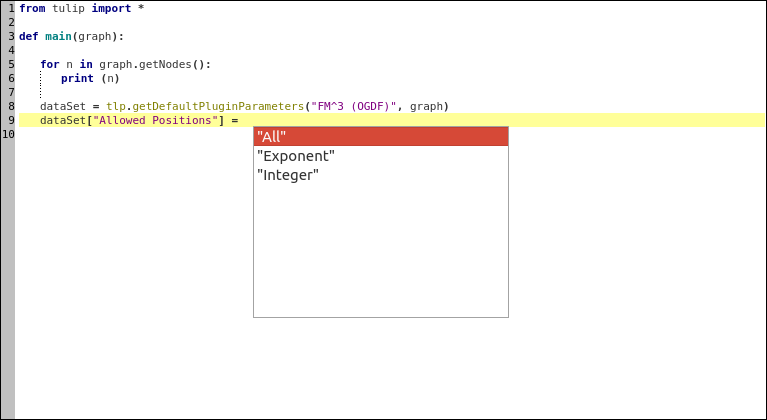
Figure 8: Using the autocompletion list to get the algorithm parameters names.
Autocompletion for graph properties
Tulip stores the data associated to graph elements in objects called properties. To get a reference on those type of objects, you can either use specific methods (for instance :
tlp.Graph.getLayoutProperty(),tlp.Graph.getSizeProperty()) that take the name of the property to retrieve as parameter or the following syntax : graph[“property name”]. When requesting the autocompletion list for the following context : graph.get*Property( or graph[, the list will be filled with the names of the corresponding and existing properties. Figure 9 shows an example of the contents of the autocompletion list for the following context : graph[.
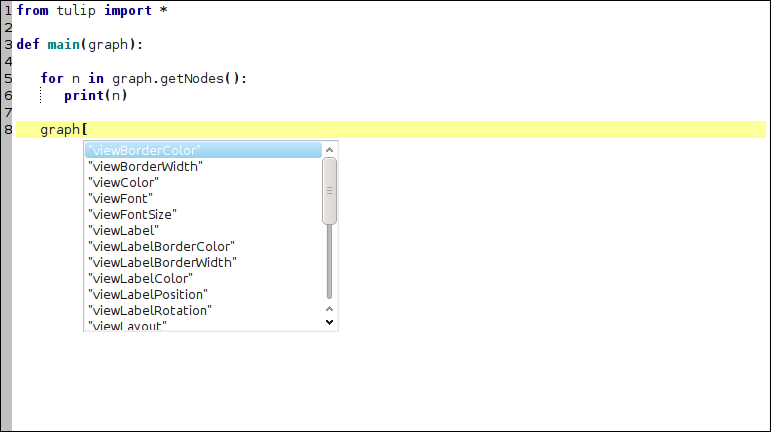
Figure 9: Using the autocompletion list to get the graph properties names.
Autocompletion list for subgraphs
Tulip allows to manipulate a large hierarchy of subgraphs. References to those subgraphs can be retrieved with their names through the use of the dedicated method
tlp.Graph.getSubGraph(). When requesting the autocompletion list for the following context : graph.getSubGraph(, the list will be filled with all the names of the graphs present in the hierarchy. Figure 10 shows an example of that use case.
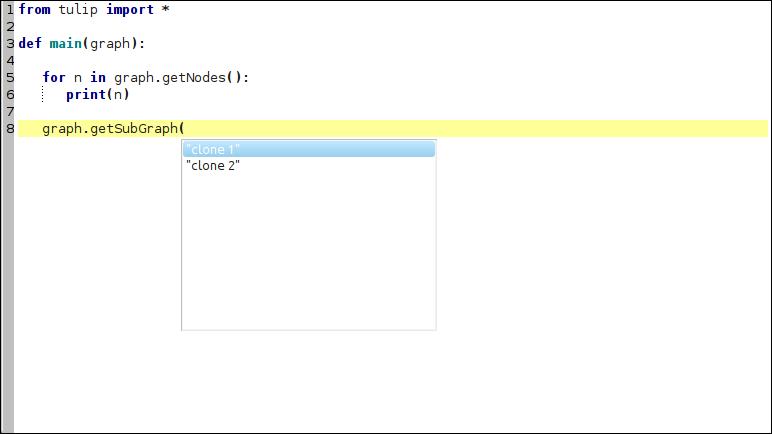
Figure 10: Using the autocompletion list to get the subgraphs names.
Save your Python code in .py files
Since Tulip 6, the code of the modules, plugins, scripts, you develop using Tulip Python IDE, is non longer saved in the Tulip projects files. You have to explicitely load/save them from/in .py file, using the Load, Save, Save as buttons available with the different editors.
Using the bindings from the Python Interpreter
The Tulip Python bindings can also be used through the classical Python Interpreter in an interactive shell. Since Tulip 4.8 release, the bindings modules are available on the Python Packaging Index. The modules are also located within the Tulip software installation, but some setup has to be done before being able to import them.
Installing the Tulip-Python modules from the Python Packaging Index
Tulip-Python modules can be easily obtained by using the pip tool for Windows, MacOS and Linux users.
Important
Please not that the tulipgui module is no more distributed on the Python
Packaging Index since Tulip 5.3.
Nevertheless, it is still available to be used use from a standard Tulip
installation (see next section).
To install the tulip module, issue the following command from a terminal prompt:
$ pip install tulip-python
And you’re done, you can now import the modules in your Python session.
Setting up the environment from the Tulip software installation
In order to be able to import the Tulip-Python modules bundled with the Tulip software installation, their path must be provided to Python. In the following, <tulip_install_dir> represents the root directory of a Tulip installation. The Tulip-Python modules are installed in the following directory according to your system :
Linux : <tulip_install_dir>/lib/tulip/python (if you compiled Tulip yourself, <tulip_install_dir> corresponds to the value of the CMake variable CMAKE_INSTALL_PREFIX)
Windows : <tulip_install_dir>/lib/tulip/python (if you installed Tulip from an installer, <tulip_install_dir> should be C:/Program Files (x86)/Tulip-x.y/ for 32 bits Tulip and C:/Program Files/Tulip-x.y/ for 64 bits Tulip)
- Mac OS<tulip_install_dir>/Contents/lib/tulip/python if you installed Tulip from a bundle (<tulip_install_dir> should then be /Applications/Tulip-x.y.z.app/) or
<tulip_install_dir>/lib/tulip/python if you compiled and installed Tulip yourself.
This path has to be added to the list of Python module search paths. To do so, you can add it in the PYTHONPATH
environment variable prior executing the Python interpreter or add it to the sys.path list once you launched the interpreter.
Warning
If you installed Tulip through a bundle (.dmg) on MacOS and want to successfully import the tulipgui module,
you also need to set the following path /Applications/Tulip-x.y.z.app/Contents/Frameworks/ as the value of the
environment variables DYLD_LIBRARY_PATH and DYLD_FRAMEWORK_PATH.
You should now be able to import the Tulip-Python modules through the classical Python shell. Issue the following commands at the shell prompt to perform that task:
>>> from tulip import tlp
>>> from tulipgui import tlpgui
Customizing the Python environment
Since Tulip 4.8, it is possible to customize the Python environment the first time the tulip module
is imported through the use of a startup scripts hook mechanism.
For instance, that feature could be used to :
modify the list of Python import paths, in order to load modules not located in standard directories from then
load Tulip plugins not located in default plugins folders
add new Python functions and classes to the environment that will be available each time the tulip module is imported
When the tulip module is imported from the first time in the current Python session, the contents of the following directories will be scan for Python files (.py extension) :
<tulip_install_dir>/lib/tulip/python/startup
<home_dir>/.Tulip-x.y/python/startup
Then, for each Python file found, its contents will be read and executed in the context of the Python main module (the file will not be imported as a Python module).