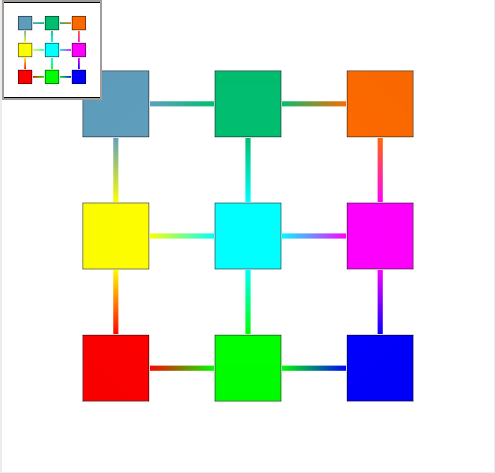
This is the most intuitive view: it draws the graph.

Buttons to act on the graph with the mouse.

3D Navigation: move, rotate and zoom the view. Zooming behavior: the point under the cursor is moved closer to the center.
Get Information: click an element (node or edge) and Tulip displays all available properties of that element.
Rectangle Selection: select all elements intersecting the selection box (the previous selection is replaced, but can be recovered withUndo). With Shift, the newly selected elements are added to the current selection; with Ctrl (Alt on Mac), the selected elements are removed from the current selection.
Selection edition: modify the shape and position. Shift-click modifies only coordinates. Ctrl-click modifies only size. Left-click outside the selection resets the selection. Click inside the selection to translate it.
 The circle rotates the selection.
 The triangle streches (horizontally or vertically) the selection.
 The square does the same as triangles, but in both directions.
 Align the selected nodes:
 align vertically on center
 align horizontally on center
 align vertically on the right side
 align vertically on the left side
 align horizontally on the bottom side
 align horizontally on the top side

Magic Selection: selects all the nodes having the same metric and connected to the clicked node. Thus, it works like the magic selection in image editing software, but consider neighboring nodes instead of neighboring pixels.
Zoom on Rectangle: Zooms on a specified rectangle area. mouse left down indicates the first corner, mouse left up indicates the opposite corner.
Add node: click to add a node at the mouse position.
Add edge: to add an edge, click the source node, optionally click outside of nodes to add bends, finally click the target node. When not tracing a link, click outside of nodes to add a node.
Edit edge bends: click on an edge to select it (with this tool), then Shift-click to add a new bend, click a bend to move it, or Ctrl-click (Alt on Mac) to remove a bend.
This is where the graph is drawn, in 2D or 3D. Several 3D views can be displayed, each one in a subwindow. Here is an example graph with 9 nodes:
Right-click (Ctrl-click Mac) to display this menu:
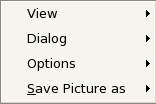
View:Redraw view,Center view.Dialog:3D Overview: toggle top left overviewAugmented Display
Options:Tooltips: toggle the display of tooltips when hovering nodes or edgesGrid: shows the grid configuration dialog.Z Ordering: Use this option when you have graph with transparent nodes or edges.Antialiasing: toggle antialiasing.Textured meta node: toggle meta node texture rendering.
Right-click a graph element to display this menu:
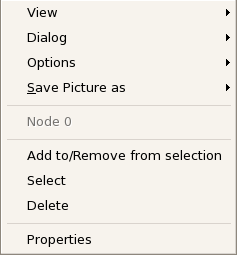
Go inside: shows the corresponding subgraph in the current view,Ungroup: removes the metanode (the nodes of its subgraph are kept in the current graph),
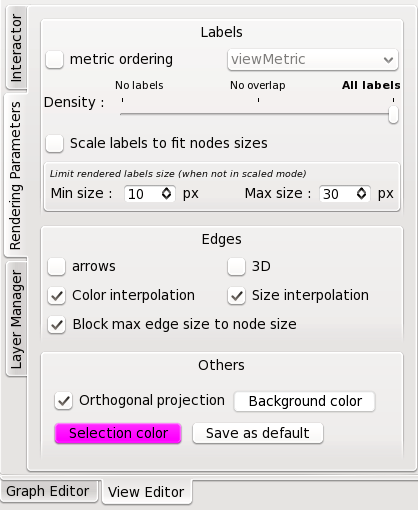
Actions in this dialog are aplied only on the current view window.
Labels:metric ordering: if checked, labels are displayed in decreasing order of the selected property (default is viewMetric).Density: move this slider to the left to have less labels displayed.Scale labels to fit node size
Edges:Color interpolation: if checked, the edge color is a gradient from the color of its source node to the color of its target node.Size interpolation: like color interpolation, but for edge width.Block max edge size to node size: if checked, the edge size cannot be greater than the node size.
Others:Orthogonal projection: If not checked, the perspective projection is used instead of the orthogonal one.Selection color: how to show that a node is selected. Click "Save at default" to apply this selection color to new views.
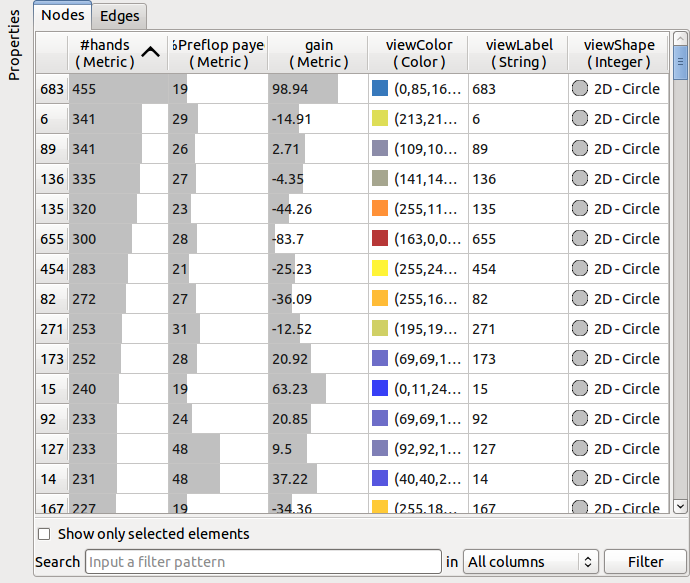
In this view you can visualize and edit the values of each graph elements (nodes or edges) using a table form. Each column represents a graph property and each row a node or an edge.
The picture  beside a property mean that property is inherited.
Nodes and edges are drawn in different tables. To switch the current table click on the Nodes or the Edges tab at the top of the view.

To edit a value double click on the corresponding cell. Once the modification done press the Enter key to commit the modification or Escape to cancel it.
To sort elements click on the label of the property. To invert the sort order click again on the label of the property.
There is three kinds of contextual menu :
Property menu
Nodes menu
Edges menu
Right click on the label of a property to show it's contextual menu.
Hide: hide the property in the table. To show it again use the property management panel.Create new property: display the property creation dialog. Choose a property type and input a property name then click on Ok.Copy to: display the property copy dialog. In this dialog you can choose to copy the property in a new property or in an existing property.Set all values: set the value of each element of the table. If a filter is defined update only displayed elements.Reset: reset properties values to default value. Do not take in account filter.Delete: delete the property. You cannot delete inherited properties.
Right click on the label of a node or on a row in the table to show the contextual menu.
Select: replace the nodes selected in the graph by the nodes highlighted in the table.Add to the graph selection: add the nodes highlighted in the table to the graph selection. Do not clear the old selection.Remove from the graph selection: remove the nodes highlighted in the table from the graph selection.Highlight selection: highlight in the table the nodes selected in the graph. Clear previously highlighted nodes.Clone: duplicate highlighted nodes in the table. Also copy the properties values.Group: create a meta node with the highlighted nodes. This action is available if more than one node is highlightedUngroup: extract all the nodes in the highlighted metanodes. Metanodes will be deleted. This action is available if all highlighted nodes are metanodes.Delete: remove highlighted nodes from the current graph.
Right click on the label of an edge or on a row in the table to show the contextual menu.
Select: replace the edges selected in the graph by the edges highlighted in the table.Add to the graph selection: add the edges highlighted in the table to the graph selection. Do not clear the old selection.Remove from the graph selection: remove the edges highlighted in the table from the graph selection.Highlight selection: highlight in the table the edges selected in the graph. Clear previously highlighted edges.Delete: remove highlighted edges from the current graph.
To show the property management panel click on the Properties button at the top left corner of the view.
Each table has it's own property management panel, so displayed properties can be different in nodes table and in edges table.
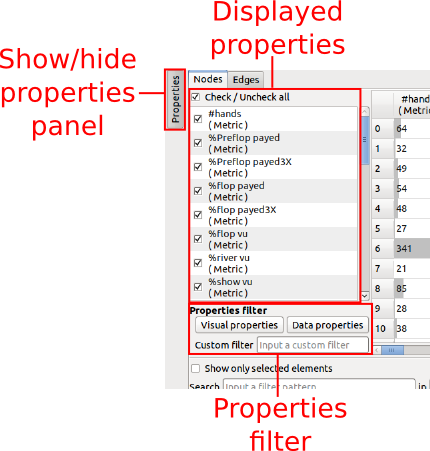
This widget allows the user to show and hide properties in the table. Check or uncheck the check-box beside a property to show or hide it.
A right click on the list display a contextual menu :
Show: show the highlighted properties. Do not hide previously displayed properties.Show selected only: show the highlighted properties and hide all the other.Hide: hide the highlighted properties.Create new property: display the property creation dialog. Choose a property type and input a property name then click on Ok.Copy to: display the property copy dialog. In this dialog you can choose to copy the property in a new property or in an existing property.Delete: delete the property. You cannot delete inherited properties.
This widget allow the user to select group of properties.
The Visual properties button selects all the properties that affect visual rendering.
The Data properties button selects all the properties containing user data i.e. properties created by the user, an algorithm or properties imported from a CSV file.
The Custom filter field allow the user to filter displayed properties using a regular expression. Each property with a name matching the pattern will be displayed.
This widget allow the user to filter displayed elements in the current table.

The Show only selected elements check-box hide all the elements that are not selected in the graph.
To filter elements using regular expression : input a pattern in the Search filed, choose to search in a specific property or in all the properties and click on the Filter button.

