Getting started
Using the bindings from the Tulip Software GUI
Tulip Python IDE
A lightweight Python IDE can be accessed through the graphical interface of Tulip. Three components are available :
- A Python REPL, accessible through the “Python” button at the bottom of the Tulip GUI (see Figure 1). It enables to execute Python statements in an interactive manner. A combo box allows to select a graph from those currently loaded in the software. The selected graph is then bound to a Python variable named “graph”. That component also contains an “Output” tab, that displays standard and error output of Python plugins (see Writing Tulip plugins in Python).
Warning
All modifications that have been performed on a graph through the Python REPL can not be undone.

Figure 1: Screenshot of the “Python REPL” component in the Tulip GUI.
- A Python Script Editor, integrated as a view plugin named “Python Script view”, accessible through the “Add panel” button at the bottom left corner of the Tulip GUI (see Figure 2). It allows to write scripts that can be applied to the graphs currently loaded in Tulip. To do so, the “main(graph)” function has to be defined in the script code and is used as the script entry point. The graph currently selected in the view is wrapped as a tlp.Graph object and provided as parameter of the “main” function. The currently edited script can be launched through the control panel located in the lower part of the view interface. Once started, the script execution can be stopped at any time. All modifications performed by a script on a graph can be undone. The view also enables to develop Python modules that can be immediately imported in the current Python session.
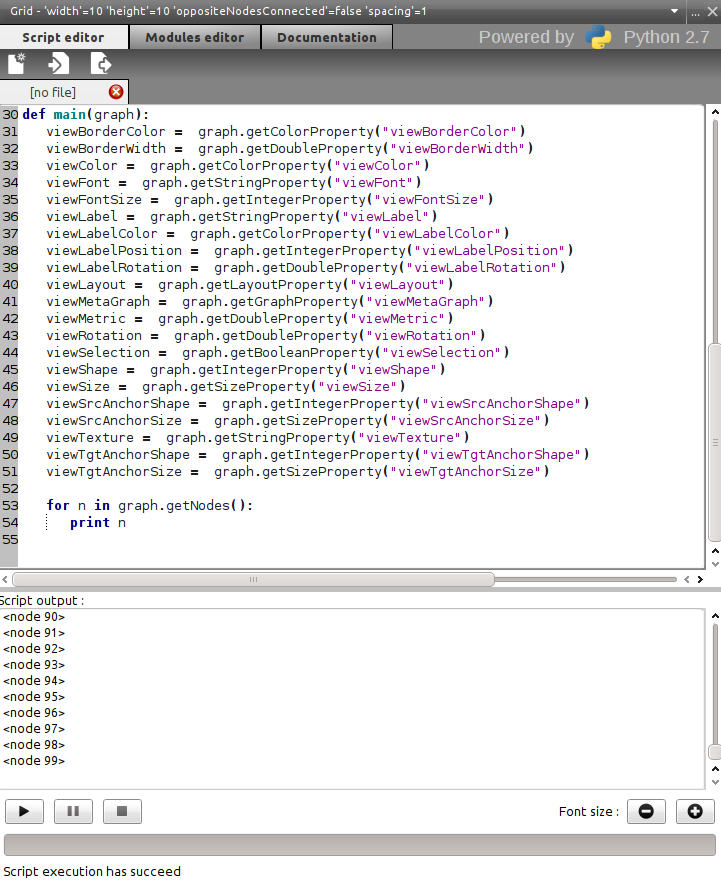
Figure 2: Screenshot of the “Python Script view” in the Tulip GUI.
- A Python Plugin Editor, accessible through the “Develop” button at the left of the Tulip GUI (see Figure 3). It enables to develop Tulip plugins in pure Python (see Writing Tulip plugins in Python). These plugins are then immediately integrated in the Tulip GUI when requesting their registration (if their source code is valid of course). Different kinds of plugins can be develop : General Algorithms, Property Algorithms, Import plugins and Export plugins. When executing these plugins, standard and error output will be displayed in the “Output” tab of the Python REPL component. That component also enables to develop Python modules that can be immediately imported in the current Python session. If there is a Tulip project associated to the current Tulip session, the source code of the plugins and modules are automatically saved in it. When reopening the project, the previously edited plugins will still be available in the editor and they will also be automatically loaded.
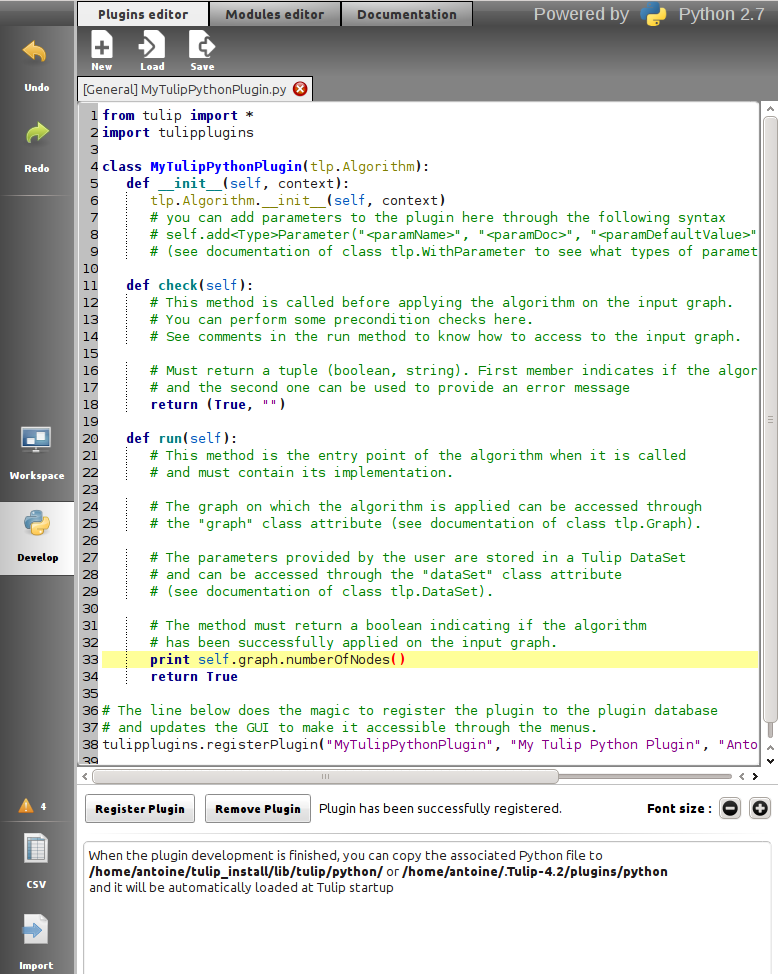
Figure 3: Screenshot of the “Python Plugin Editor” in the Tulip GUI.
Using the autocompletion to code faster
Each Python code editor widget provides an autocompletion feature in order to ease the developpment of scripts. To activate it, just hit Ctrl + Space and the autocompletion list will popup. Its content will depend on the context before the current position of the text cursor.
Python objects autocompletion
The autocompletion list feature is really usefull to get the content of the dictionnary of Python objects. The list is filled by fetching the content of a database according to the context. That database contains the API of all standard Python modules but also the tulip ones. That database is also updated dynamically by performing a static analysis on the source code (in particular, that analysis tries to associate a typename to each variable in the source code). The autocompletion will also popup immediatly when hitting a dot character. If the variable before the dot has an associated typename in the database, only the content of its dictionnary will be inserted in the list. Figure 4 shows an example of the content of the autocompletion list when requesting it on the “graph” variable (of type tlp.Graph)
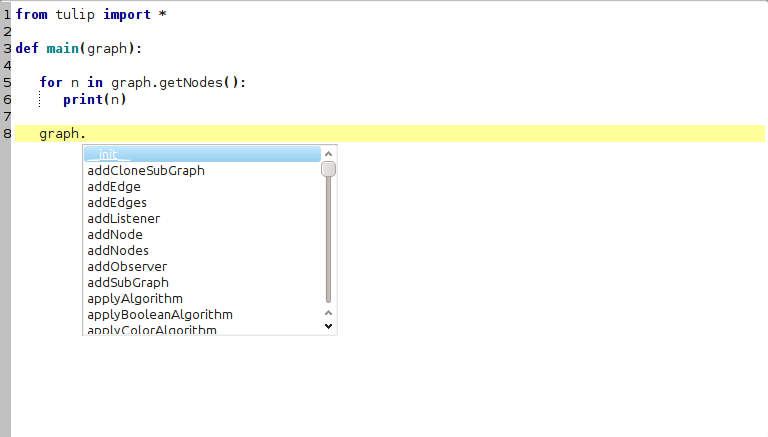
Figure 4: Using the autocompletion list to get the dictionnary content of a Python object.
Tulip special autocompletion features
The autocompletion list is also there to ease the developpment of Tulip Python scripts. Some special features have been including to ease the use of the Tulip Python API:
- Autocompletion for algorithms Tulip is bundled with a lot of algorithms (plugins) that can be called through Python. To call an algorithm (plugin), one of the following method has to be used : tlp.Graph.applyAlgorithm(), tlp.Graph.applyBooleanAlgorithm(), tlp.Graph.applyColorAlgorithm(), tlp.Graph.applyDoubleAlgorithm(), tlp.Graph.applyIntegerAlgorithm(), tlp.Graph.applyLayoutAlgorithm(), tlp.Graph.applySizeAlgorithm(), tlp.Graph.applyStringAlgorithm(), tlp.importGraph(), tlp.exportGraph(). The first parameter of those method is a string contaning the name of the algorithm (plugin) to call. When requesting the autocompletion list with the following context : graph.apply*Algorithm(, it will be filled with the names of the corresponding algorithms (plugins). Figure 5 shows an example of the content of the autocompletion list when requesting it with the following context : graph.applyLayoutAlgorithm(.
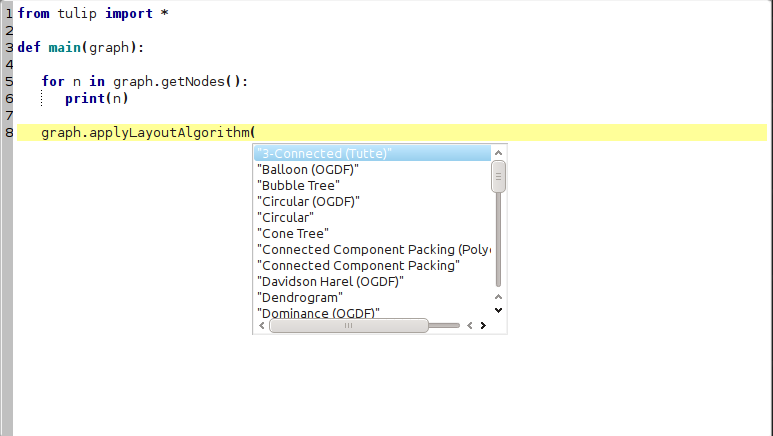
Figure 5: Using the autocompletion list to get the algorithm names.
Autocompletion for algorithm parameters Parameters can be transmitted to Tulip algorithms through a tlp.DataSet object. The parameters are identified by their names. The autocompletion list can be used to get the names of these parameters. For that feature to work, the following context must be present in the source code:
# Replace by the name of the algorithm you want to call, note that the autocompletion
# also works for the following context : tlp.getDefaultPluginParameters(
dataSet = tlp.getDefaultPluginParameters("algorithm name")
# Hit Ctrl-Space after the bracket to see the magic
dataSet[
Figure 6 shows an example of the autocompletion list content when requesting the parameters of the layout algorithm : “FM^3 (OGDF)”.
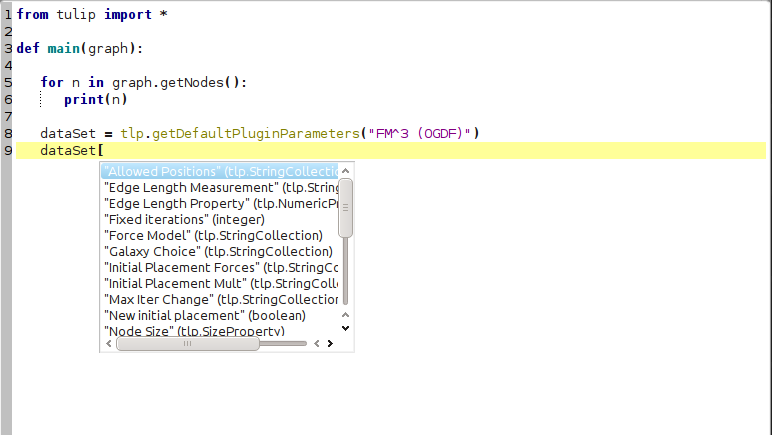
Figure 6: Using the autocompletion list to get the algorithm parameters names.
- Autocompletion for graph properties Tulip stores the data associated to graph elements in objects called properties. To get a reference on those type of objects, you can either use specific methods (for instance : tlp.Graph.getLayoutProperty(), tlp.Graph.getSizeProperty()) that take the name of the property to retrieve as parameter or the following syntax : graph[“property name”]. When requesting the autocompletion list for the following context : graph.get*Property( or graph[, the list will be filled with the names of the corresponding and existing properties. Figure 7 show an example of the content of the autocompletion list for the following context : graph[.
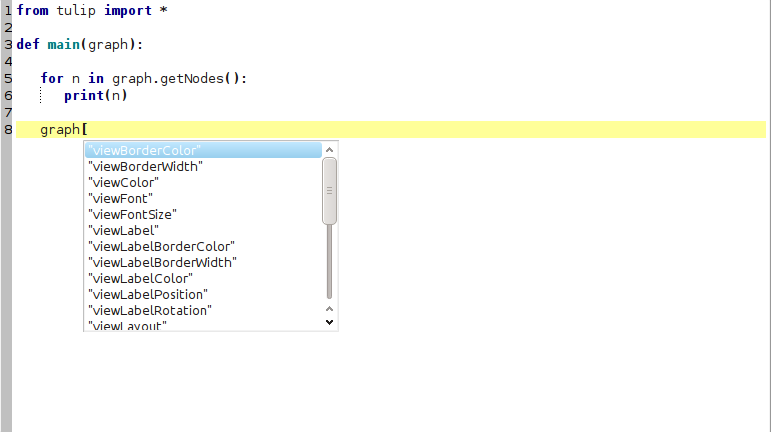
Figure 7: Using the autocompletion list to get the graph properties names.
- Autocompletion list for sub-graphs Tulip allows to manipulate a large hierarchy of sub-graphs. References to those sub-graphs can be retrieved with their names through the use of the dedicated method tlp.Graph.getSubGraph(). When requesting the autocompletion list for the following context : graph.getSubGraph(, the list will be filled with all the names of the graphs present in the hierarchy. Figure 8 shows an example of that use case.
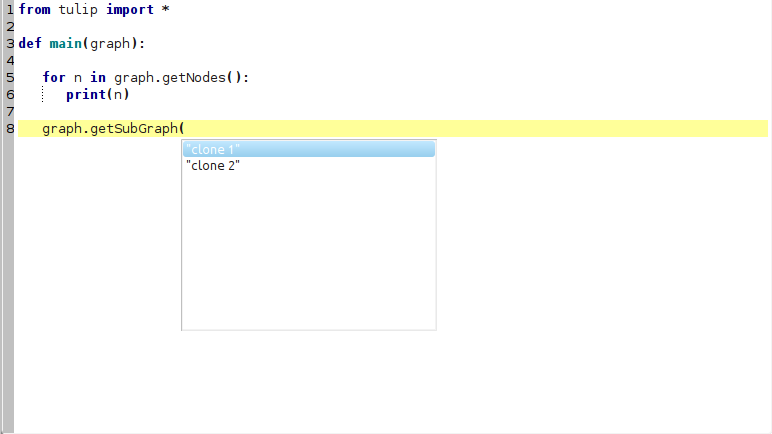
Figure 8: Using the autocompletion list to get the sub-graphs names.
Using the bindings from the Python Interpreter
Setting up the environment
The Tulip Python bindings can also be used through the classical Python Interpreter. But some setup has to be done before importing the tulip module.
First, the path to the tulip module must be provided to Python. In the following, <tulip_install_dir> represents the root directory of a Tulip installation. The Tulip Python module is installed in the following directory according to your system :
- Linux : <tulip_install_dir>/lib/python (if you compiled Tulip yourself, <tulip_install_dir> corresponds to the value of the CMake variable CMAKE_INSTALL_PREFIX)
- Windows : <tulip_install_dir>/bin/python (if you installed Tulip from a bundle, <tulip_install_dir> should be C:/Program Files (x86)/Tulip/)
- Mac OS : <tulip_install_dir>/Contents/Frameworks/python (if you installed Tulip from a bundle, <tulip_install_dir> should be /Applications/Tulip-4.X.Y.app/)
This path has to be added to the list of Python module search path. To do so, you can add it in the PYTHONPATH environment variable or add it to the sys.path list.
Second, your system must be able to find the Tulip C++ libraries in order to use the bindings. These libraries are installed in the following directory according to your system :
- Linux : <tulip_install_dir>/lib/ (if you compiled Tulip yourself, <tulip_install_dir> corresponds to the value of the CMake variable CMAKE_INSTALL_PREFIX)
- Windows : <tulip_install_dir>/bin/ (if you installed Tulip from a bundle, <tulip_install_dir> should be C:/Program Files (x86)/Tulip/)
- Mac OS : <tulip_install_dir>/Contents/Frameworks/ (if you installed Tulip from a bundle, <tulip_install_dir> should be /Applications/Tulip-4.X.Y.app/)
You have to add this path to :
- the LD_LIBRARY_PATH environment variable on Linux
- the DYLD_LIBRARY_PATH environment variable on Mac OS
- the PATH environment variable on Windows.
You should now be able to import the tulip module through the Python shell. Issue the following command at the shell prompt to perform that task:
>>> from tulip import *
Note
If you have installed Tulip from a bundle (Windows or Mac OS), the Tulip bindings were built against Python 2.7 and you need to use the same Python version to be able to import the tulip module.
Loading Tulip plugins
If you want to use Tulip algorithms implemented as plugins written in C++ or Python (e.g. graph layout algorithms), you have to load them before being able to call them (see tlp.Graph.applyAlgorithm(), tlp.Graph.applyLayoutAlgorithm(), ...).
Since Tulip 3.8, all plugins shoud be automatically loaded when you import the tulip module.
If you use a Tulip version anterior to the 3.8 release, you have to proceed as described below to load the plugins.
To load all the Tulip plugins written in C++, you have to execute the tlp.initTulipLib() and tlp.loadPlugins() functions the following way if you compiled Tulip yourself:
>>> tlp.initTulipLib()
>>> tlp.loadPlugins()
If you installed Tulip from a bundle, you need to specify the path to the Tulip binary as parameter of the tlp.initTulipLib() because some paths were hardcoded during the compilation:
>>> tlp.initTulipLib("<path_to_tulip_binary>")
>>> tlp.loadPlugins()
The path to the Tulip binary is given below according to your system:
- Linux and Windows : <tulip_install_dir>/bin
- Mac OS : <tulip_install_dir>/Contents/MacOS
