Configuring the IDE QtCreator
Using a simple text editor to write code is not always the most enjoyable experience. Several integrated development environment exist and are freely available today, offering to ease our work with useful tools.
The steps presented above have been done on a Ubuntu distribution (12.04 LTS) with the IDE QtCreator (2.8.1). Similar operations have been realized on Windows 7 and 8.1 with success after a short configuration of the IDE.
If you are willing to use another integrated environment like Code::Blocks or Eclipse, you may still find some of the information displayed here to be helpful to guide you through the process.
Before starting, you should have completed all the steps describe in the previous section and thus have a working installation of Tulip on your system.
Installing QtCreator
Obviously, this step is unavoidable. You will need to download the IDE on its official download page. You can choose the full Qt library or just the stand-alone QtCreator version. However, picking up the second one will provide you with the tools you need and save you some downloading time.
Once you have the installer, your desktop environment should be able to run it, giving place to a setup wizard. Just follow the installation instructions.
If you can not open the package (with a double-click, for instance), try to execute it through the terminal windows or check if its execution permissions are adapted.
Importing the existing project
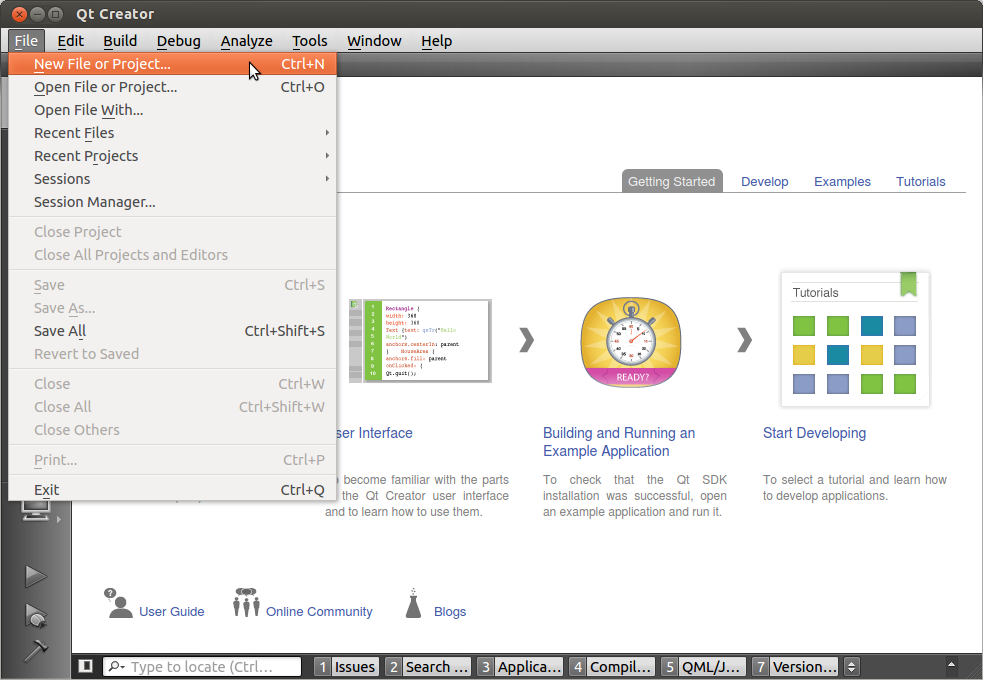
Once QtCreator is installed, launch it and create a New File or Project... through the File menu.
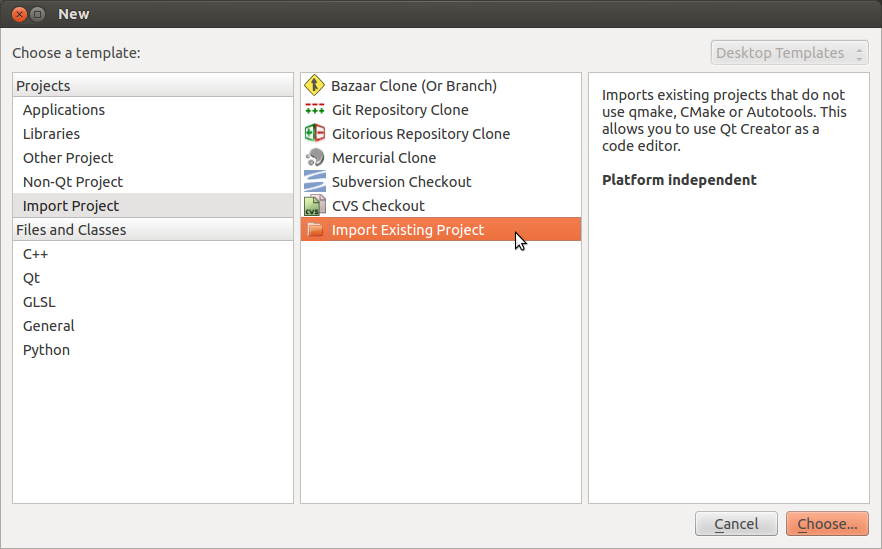
Among the Projects type, choose Import Project and select the Import Existing Project template.
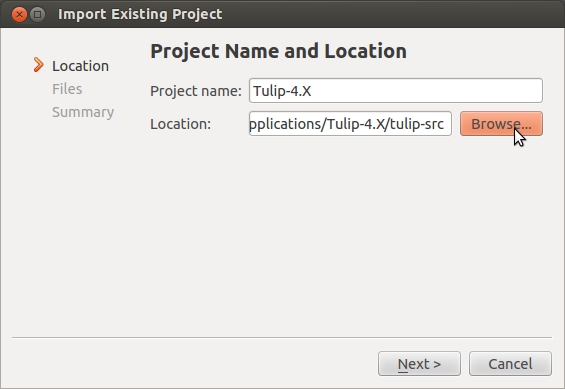
With the click on the Choose button, the import window will open, asking you to indicate the project name and its location. The project name is up to you but the location field must refer to the Tulip source directory (in our case: [...]/Tulip-4.3/tulip-src).
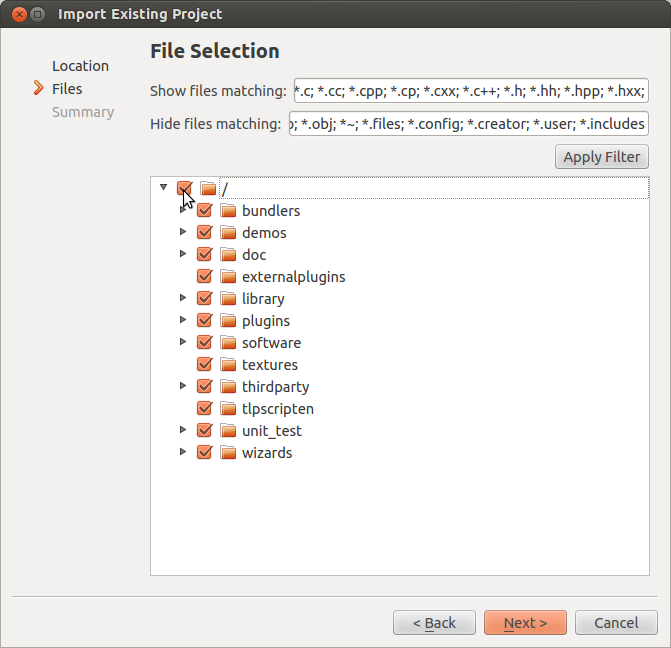
QtCreator will import a tree view of the source directories and files. Make sure to check the case in front of the tree root to include every file of the project.
This last panel offers to manage your project with a version control system. This choice is yet again up to you. If you do not want to add a version control, proceed by clicking on the Finish button.
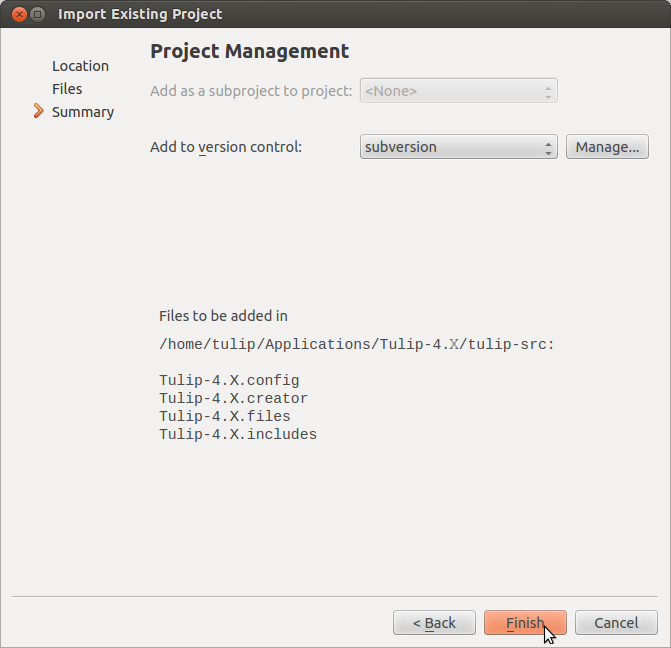
At this point, you have successfully import the project, however, a few more actions need to be done to set the building and running options right. In the coming examples, we want to set up the project for a release execution.
Build the project (Release version)
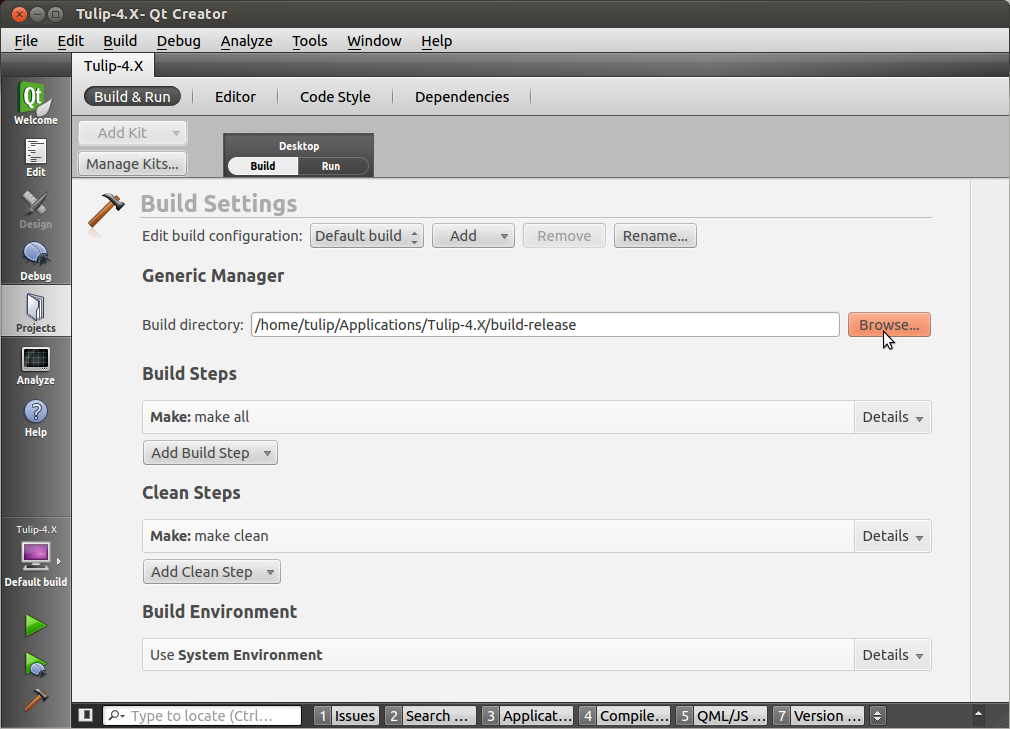
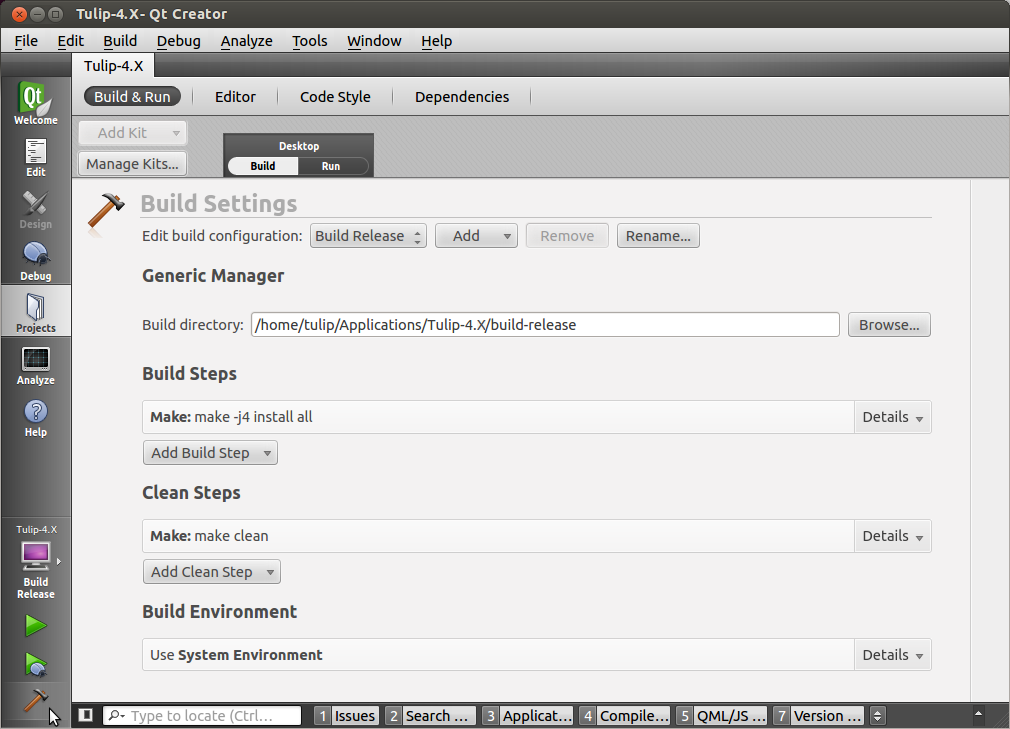
Once you have imported the project, click on the tab Projects located to the left of the window, select the Build & Run panel and the Build Settings.
Fill up the Build directory field (in our case the corresponding path is [...]/Tulip-4.3/build-release).
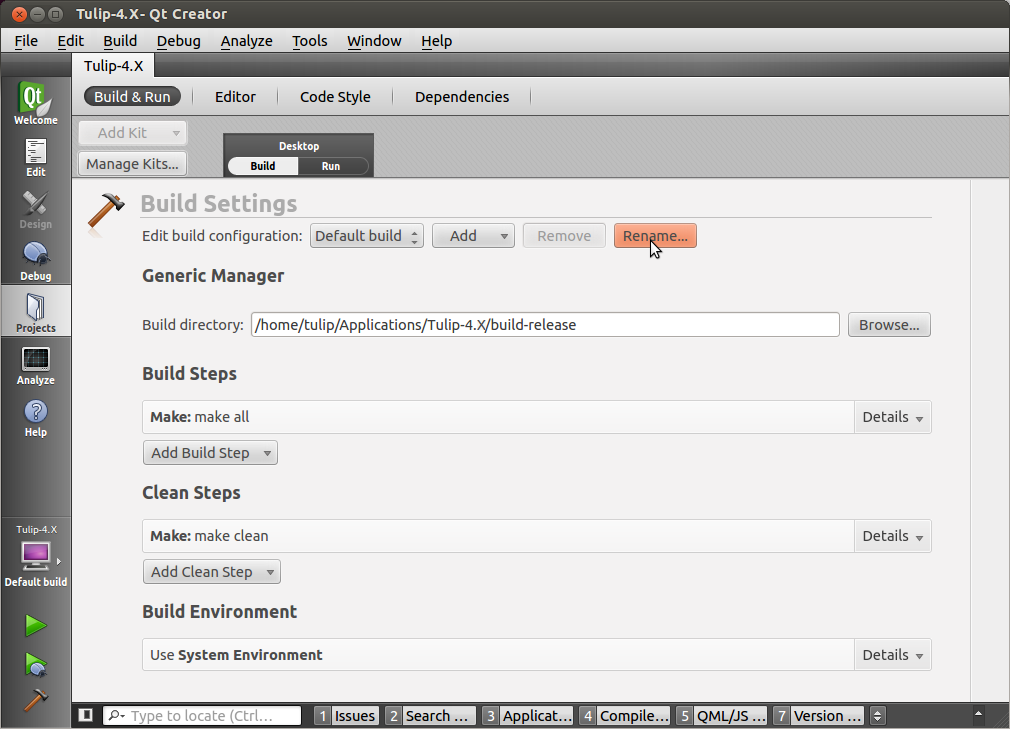
For easely find the current build configuration, you can rename it.
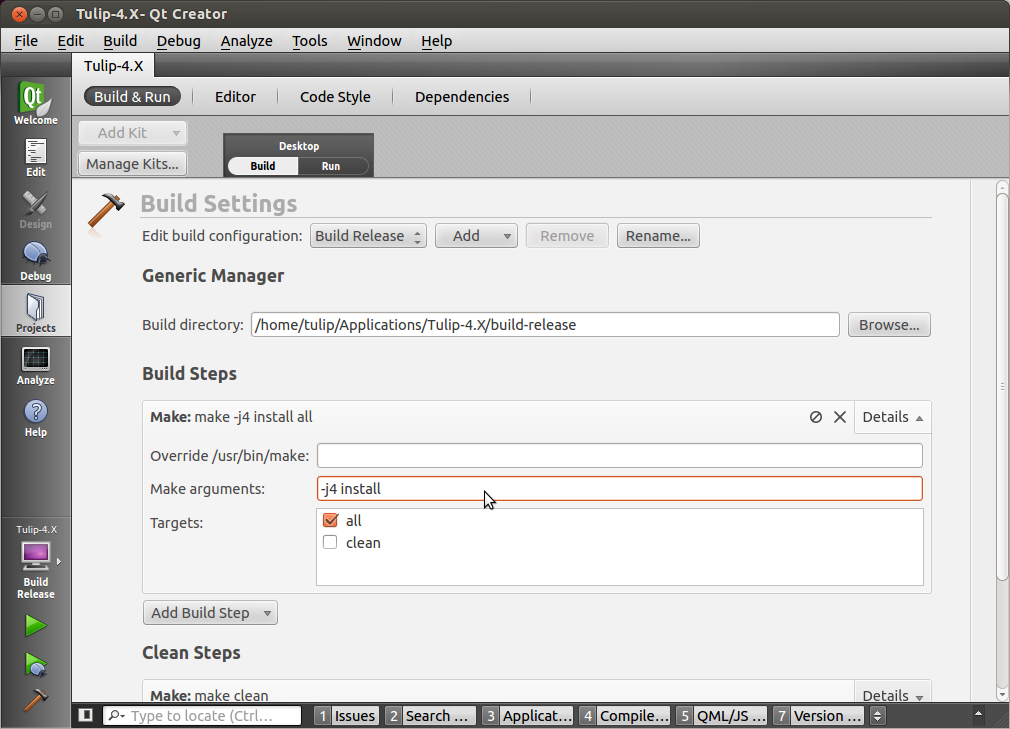
Then specify the make arguments: first come -jX, where X is the number of core you want to compile the project on at each build; the second is install, enabling the information display during compilation.
Compile the project (Release version)
With all the build settings done, you can start the project compilation. If you have not realized the step Use the Makefiles described above, the operation can take several minutes. However, rest assured, only the first compilation will take this long, the next ones will focus on the updated files and only compile the strict minimum.
To start the compilation, click on the brown hammer located at the bottom-left of the window.
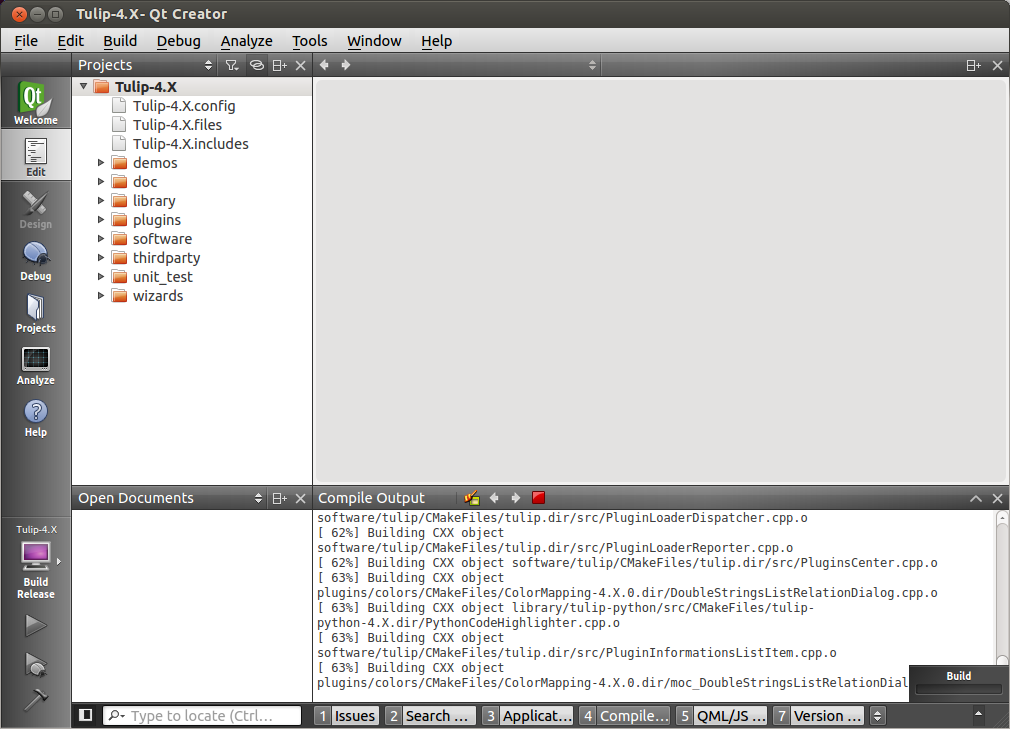
In the Edit view, the Compile Output allows you to see the progress made and the file being currently build.
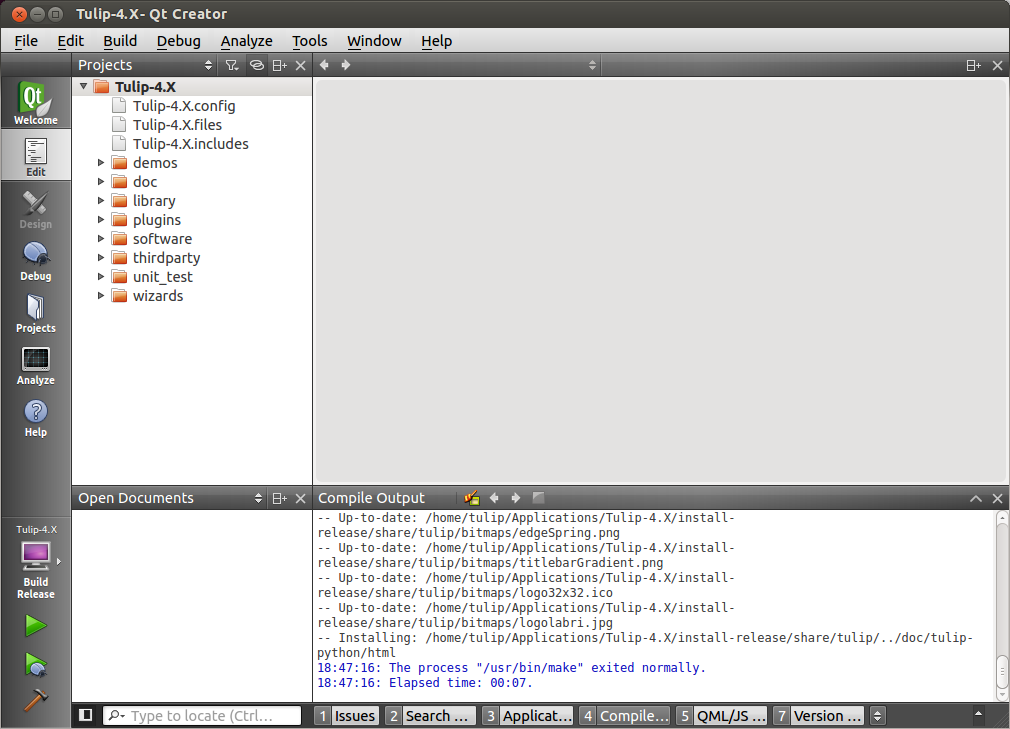
With the compilation being successful, you should have a QtCreator window similar to this one:
Run the project (Release version)
The project has been build and compile, we just need to run it to use it. To do so, return to the Build & Run panel in the Project tab and select the Run Settings.
We will start by changing the name of the Run Configuration :
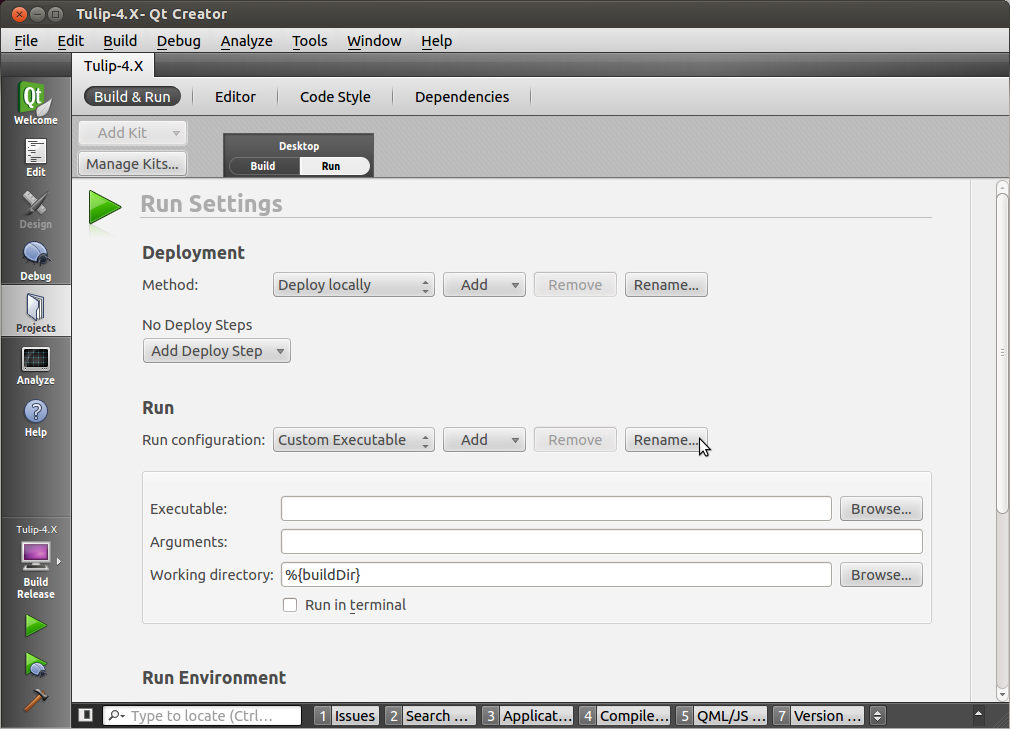
In the executable field, indicate the path to the Tulip program (in our case: [...]/Tulip-4.3/install-release/bin/tulip):
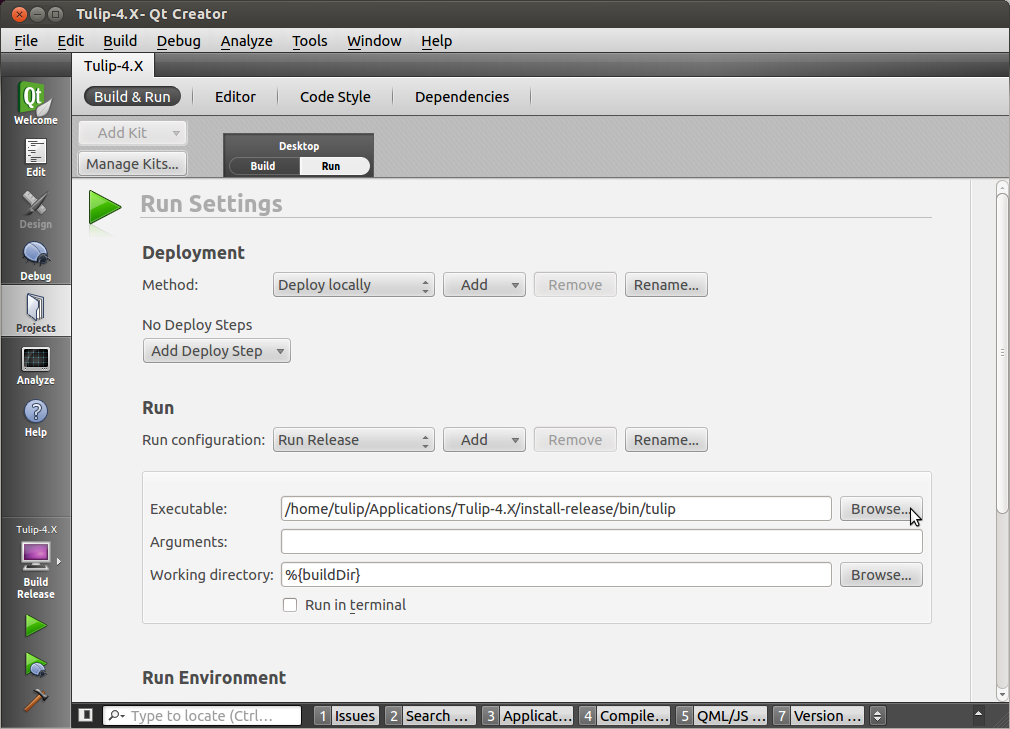
Once the field is filled, run the program by clicking on the green right arrow on the window left-bottom side.
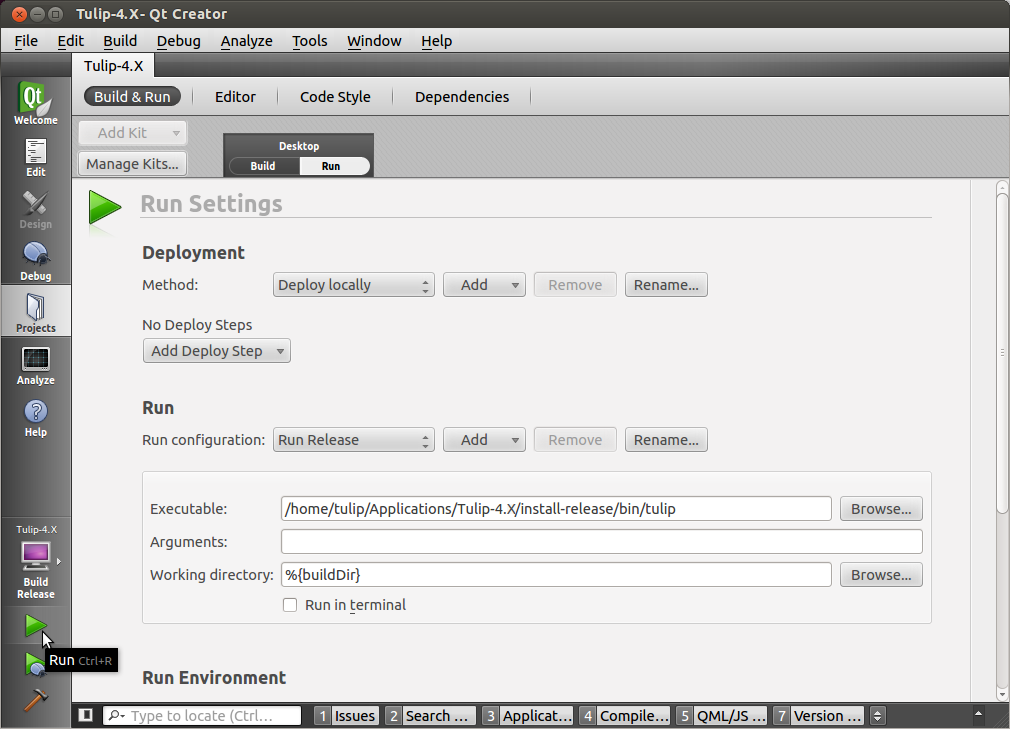
Please note that, by default, running the project will also recompile the sources. Do not hesitate to consult the QtCreator website to learn more about the IDE and its advanced possibilities.
Change the compile and run configuration
The previous steps were exclusive to the Release compilation and execution. Now that we have presented the fields and the values to use, you should be able to repeat the same steps for the Debug mode.
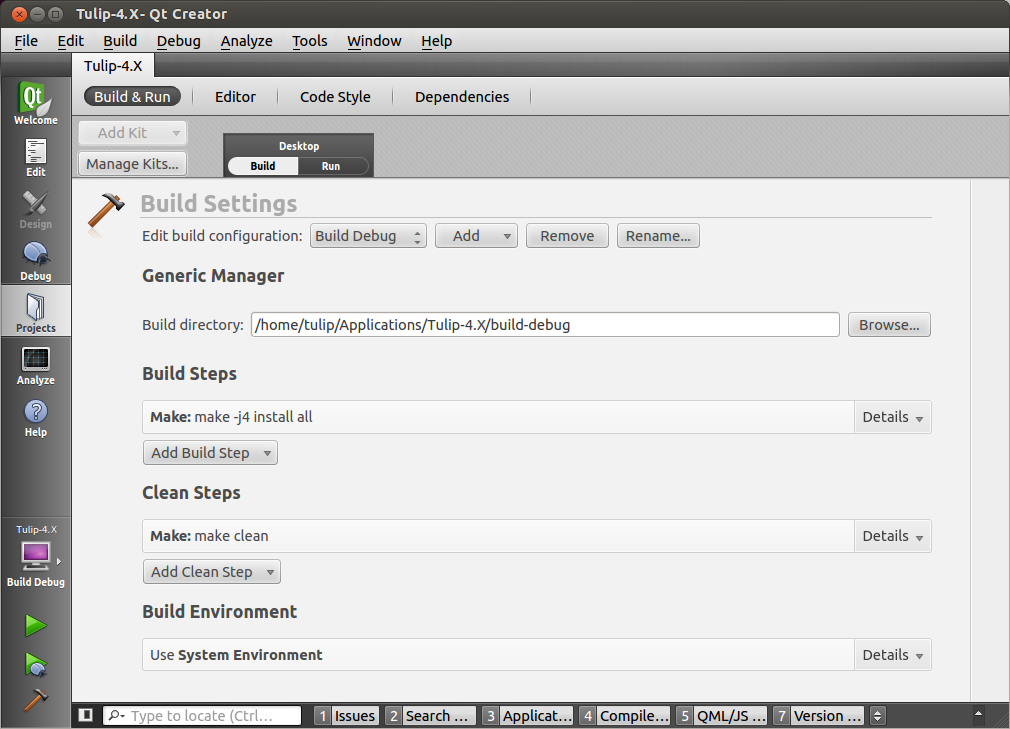
In the Build Settings, you just have to clone the configuration, rename it and adapt the Build Directory value (if you have followed our model, it should be [...]/Tulip-4.3/build-debug).
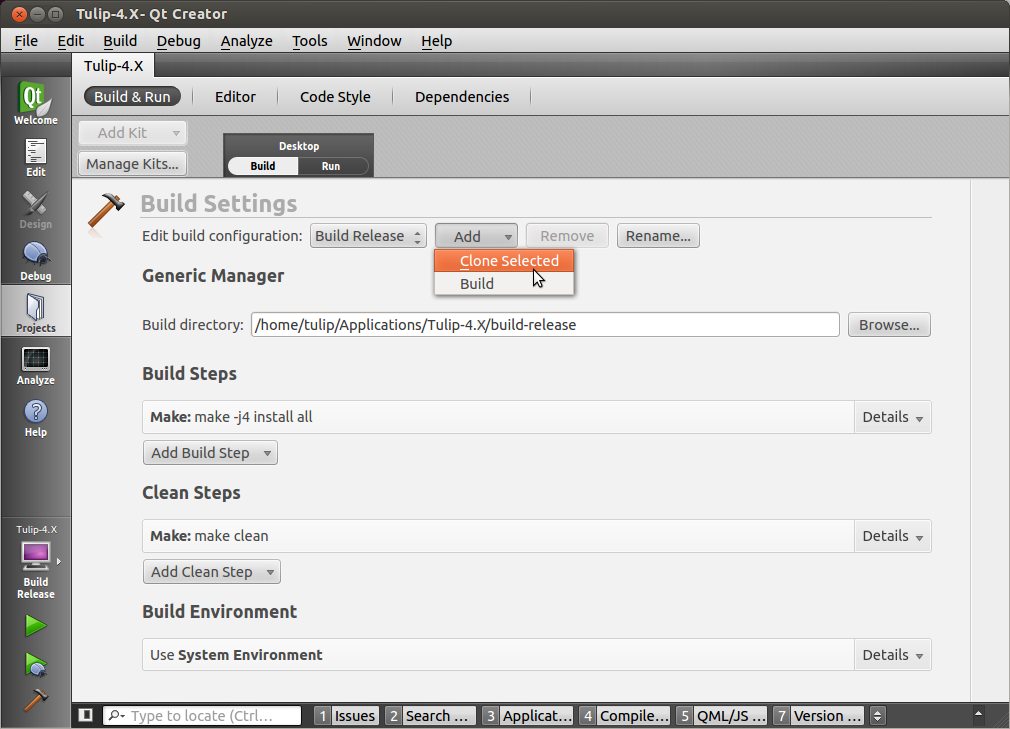
The full setting will look like this:
The Run Settings does not offer to clone the current configuration, you will have to fully redo it. Create a new Custom Excecutable:
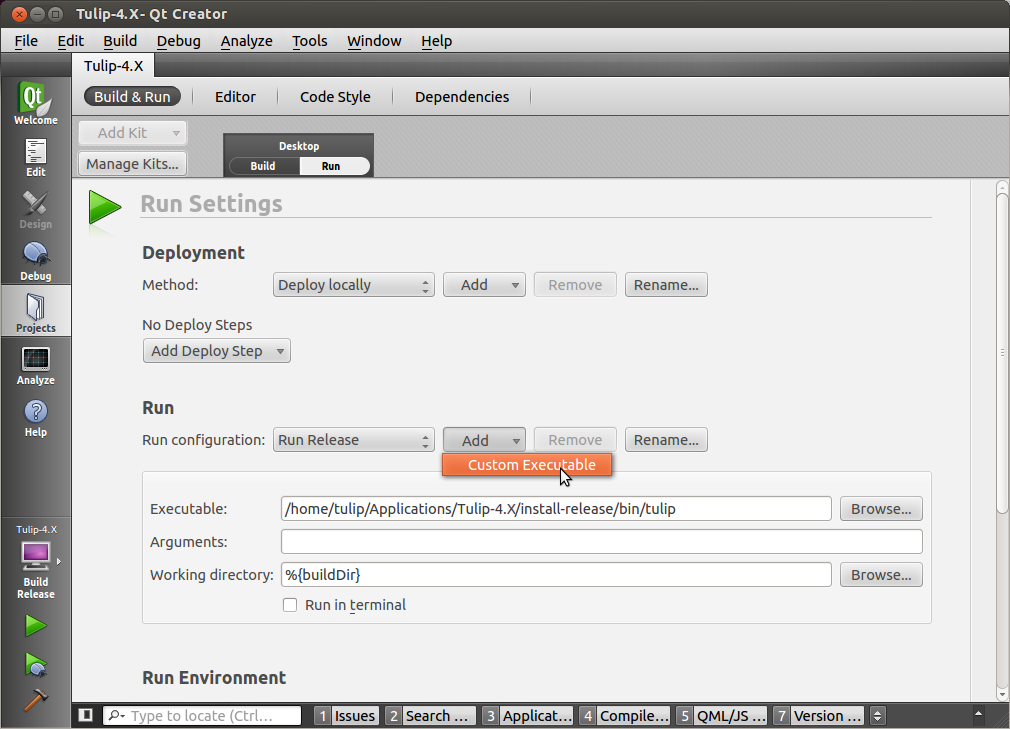
Change the path to the appropriate directory (for us: [...]/Tulip-4.3/install-debug/bin/tulip) and rename the configuration:.
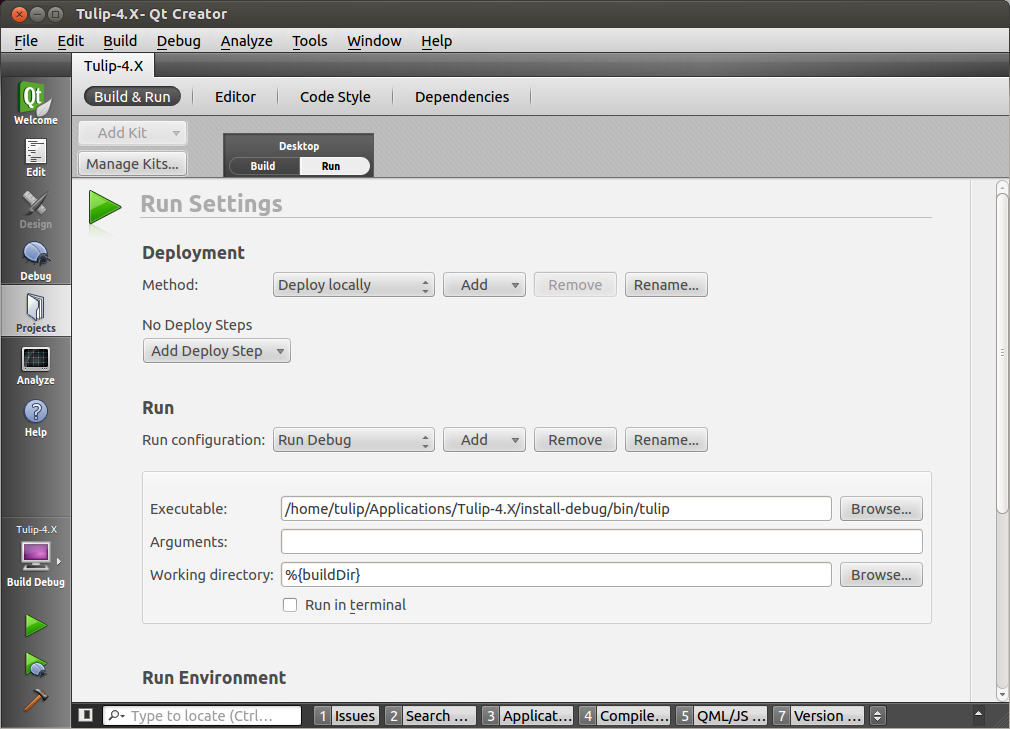
Before building and running the program, you can choose which type of deployment you want to use:
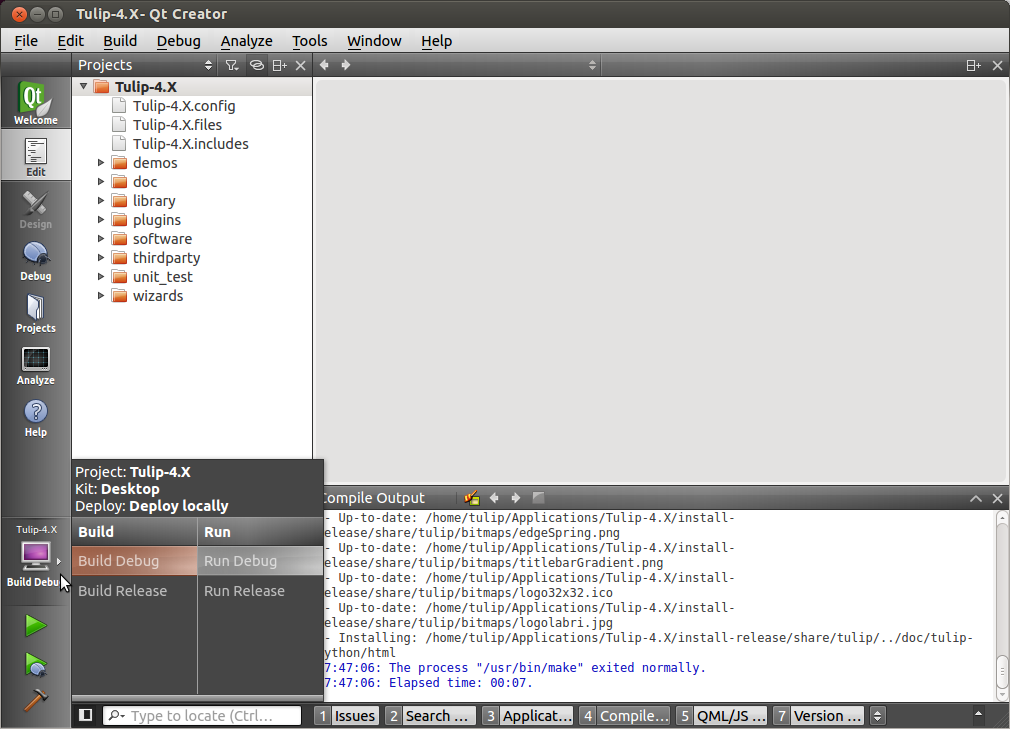
Always make sure, when you switch from one to another, to use compatible build and run configurations.